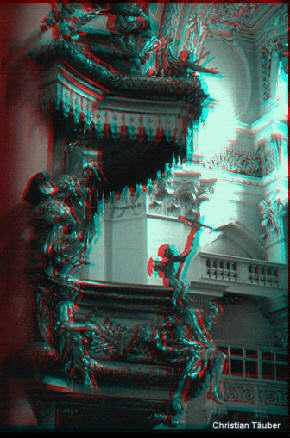
Red/Blue
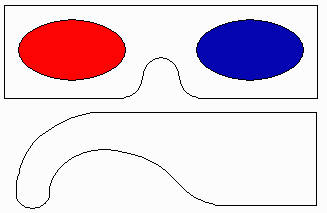
Glasses are available from most any comic book shop.Ā Or you can make your own from colored strips of Cellophane (See Pic below).Ā The concept is simple, display the left image in blue and the right image in red, then the red cellophane on the left eye will block the right eyes image and the blue cellophane will block the left image.
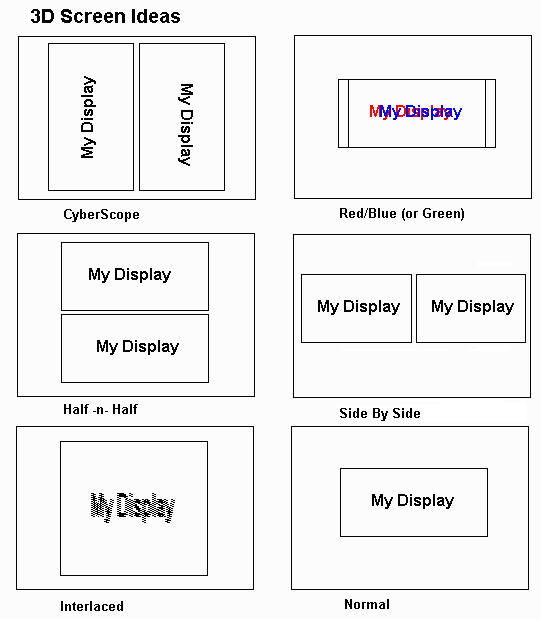
Programming is simple, just put up both a red and blue image on the screen at the same time. To allow both images to be displayed at once, you will need to combine the red and blue gradients together to get a pallet with shades of purple, along with shades of red/blue (your pallet size will be the (number of colors)^2, i.e. for 16 shades of gray you need a pallet of 16x16 entries or 256 entries, it is also possible to recompute the pallet on the fly, but this is still your worst case scenario).ĀĀ Note, this is a nice cheap solution, even if it does not offer the best images. NEW - an example of a full color red-blue image, basically the red remained the left image and you combine both the green and blue colors for the right image...

Spike's 3D Glasses
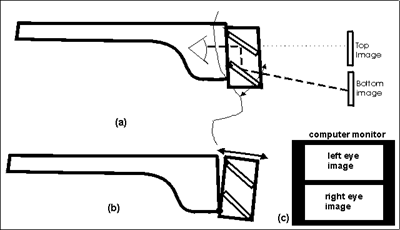
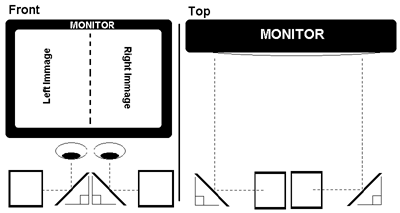
Basically by placing a small 'Periscope' over your right eye, you can view two separate images, one over the other. With the top image going to the left eye and the bottom image going to the right. I have yet to make this, when I do Ill offer more tips on design (I'm thinking a toilet paper tube would be a nice holder for the mirrors...)
Programming is simple, place the left image on the upper half of the screen, and the right image on the lower half. This appears to be quite flexible, handling a wide variety of screen sizes. And offering fairly sharp image quality (Using front surfaced mirrors would be better, for you astronomy buffs). This is a good alternative to the Red-Blue glasses, being cheap and easy to make.
OK, I made a pair of these last night, and I have a few notes, first I used mirrors out of my Wife's old compact's. They are about the perfect size (A little to big, but easy to cut down...). Then I grabbed a toilet paper tube and cut the ends off at 45 degree angles, parallel to each other, then I cut holes in the sides of the tube and glued the mirrors in place (Making a small periscope. This worked great, except for one small problem. By fixing the angle of the second mirror you fix the size of an image that you can see (You can not simply tilt the whole apparatus to see different size images), so to correct this I need to make the bottom mirror 'swivel' so you can adjust for odd sized images (Images that are really small, like on this page, were impossible to see). Another problem I noticed, was the path from your left eye to the screen is shorter than the path from your right eye through the mirrors and to the screen. Thus the right eye sees a smaller image. It would be best to make 2 sets of mirrors, or try to place the mirrors as close to each other as possible, to reduce this effect (It defiantly detracts from the 3D effect, and can cause headaches, as your eyes try to compensate...). Also mirror registration is a serious problem, it is incredibly important that the mirrors be heald parallel to each other, otherwise you get odd distortions on the display that lead to poor 3d effects and headaches. Maybe finding a kids mini periscope would make things better...

WaiteGroups Frenzle Lens
Two Frenzle lenses are held about 3 inches from the display, each lens being angled outward. By placing your eyes between the lenses each eye will be directed outward a bit, allowing you to view a parallel view image, without straining your eyes.Ā The glasses work great for what there designed for, but the image size is fairly restricted, and the display tends to blur a loot at the edges (Cheap optics!).
To Program, simply place 2 images side by side as if 'Free Viewing'.Ā The max. width of the two images is about 10 inches across.Ā This idea could be extended with better optics to allow for bigger, and clearer images.Ā Also with a bit of work you could 'cross' the images allowing for viewing of 'crossed eye' images (For those of us who can not cross our own eyes!)Ā Ultimately this idea is restricted to the width of the display screen,Ā it does not make good use of screen real estate, Spike's 3D glasses are a better idea (In my humble opinion).

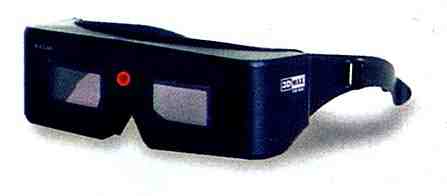
Shutter Glasses
A pair of LCD 'shutters' sit over each eye, each shutter is turned on in turn allowing first the left then the right eye to view the monitor, then it is simply a task of always displaying the right image at the right time.Ā Most modern LCD glasses use either an 'Interlaced' mode, where alternate scan lines are fed to each eye automatically (Just put up an interlaced image, see below) and the glasses decode it, no need to worry about graphics modes).Ā Or the more expensive models can decode images in the 'Over-Under' format where the left eye image is placed on the upper half of the screen and the right eye image is placed on the lower half of the screen, with a small blank buffer in between.
Again programming is simple, either put up your images in an 'interlaced' form (see below) or split the screen horizontally and display the left and right image on the top and bottom of the screen.Ā Some glasses might require specially encoded image lines, to start the glasses going, but I'm not clear on this, and will not support it, unless asked to.Ā I feel these offer the best cost to value ratio, most glasses can be had for under $100 and with a good monitor (with a high refresh rate) image quality is quite nice.
 Ā
Ā
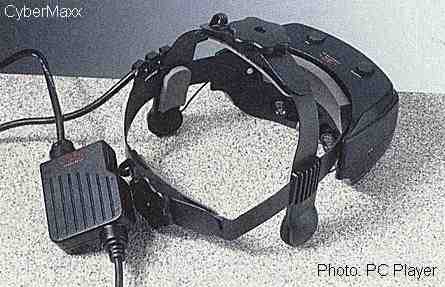
Head Mounted Display
A pair of LCD displays sit over each eye, each display feeds the left and right image to the appropriate eye.ĀĀ Head Mounted Displays operate similar to shutter glasses, using either an 'Interlaced' mode, where alternate scan lines are fed to each eye automatically (Just put up an interlaced image, see Shutter Glasses above) and the glasses decode it, no need to worry about graphics modes).Ā Or the more expensive models can decode images in the 'Over-Under' format where the left eye image is placed on the upper half of the screen and the right eye image is placed on the lower half of the screen, with a small blank buffer in between.
Again programming is simple, either put up your images in an 'interlaced' form (see above) or split the screen horizontally and display the left and right image on the top and bottom of the screen.Ā Some glasses might require specially encoded image lines, to start the glasses going, but I'm not clear on this, and will not support it, unless asked to.Ā Head Mounted Displays usually suffer from Very low image resolutions (Unless you pay big bucks), they typically dither down the current display image into a resolution the glasses can handle, so there is no need to program for there odd resolutions.Ā Also the glasses are still quite expensive, and the image quality is not the best (The i-glasses I tested out were not that great at least),Ā your better off with a pair of shutter glasses, unless your looking for head tracking or you have a lot of money to burn.
 Ā
Ā
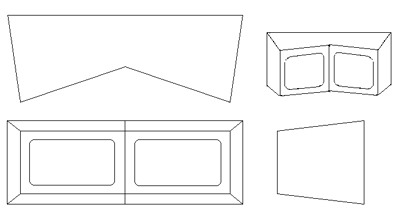
CyberScope
A hood that attaches to your monitor.Ā Allowing for 3D viewing using a series of mirrors to send separate images to each eye.Ā I don't think this is still in production (Can anyone clarify this for me?).
To program for the CyberScope simply display the left and right images side by side, only rotate them by 90 degrees in opposite directions (See image below), the mirrors in the hood will reorient the images and send them along to the appropriate eyes. Image quality is great, but this device is not very flexible, there is no convenient way to view images that are not full screen.Ā Also, obtaining one might be troublesome.Ā New - I added a drawing of the mirror arrangements in the CiberScope (I don't have a CiberScope to look at, so this is just my ideas on how it works, figured it out by playing with 2 mirrors...Ā If you successfully make your own, let me know.Ā If the drawing is confusing, basically its 2 sets of 2 mirrors held at 45 degree angles,Ā with each mirror being fliped horizontally and rotated by 90 degrees from each other (Take another look, the pic makes more sense than this explanation =0).
New: hear is the patent # of the CyberScope 'us 5357369', this is suppose to have a good description of the whole thing.
 Ā
Ā
Prism Glasses
A pair of prisms ( maid by stretching a sheet of mylar in one direction) are placed over each eye (the prisms being reversed from each other). When viewing color images any thing that is blue will appear far away, and red will appear close, with the remaining colors filling in the blanks.Ā This works really great on printed images, but it has been my experience that the colors on the monitor are not 'mixed' well enough, so the prisms pull apart the red/green/blue colors instead of viewing it as one solid color (Very weird effect!)
Programming is simple, just vary the base colors, according to the depth,Ā I think the shade or 'intensity' of the colors will have no effect on the depth, so your free to use those separately...ĀĀĀ I'm ordering a new pair of glasses, supposedly there optimized to work with PC monitors, we will see what happens, maybe this will make it to my 'supported' list (It would make the VB more colorful!).
 Ā
Ā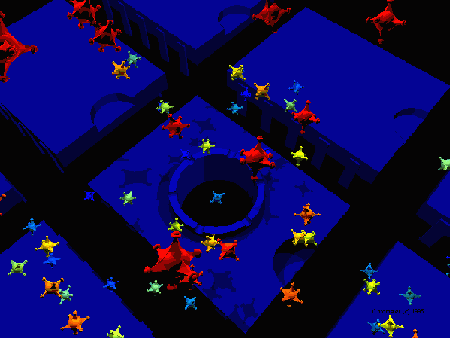 Ā
Ā
Brief Summary:
 Ā
Ā
Link's
www.stereo3d.com
- Great source of info on Shutter and Head Mounted displays
Spike's Big Vectrex Emulation Page - Spikes 3D glasses
Stereoscopy.com
- World of 3D Imaging...
CromaDepth
- Makers of prism glasses for use on the PC
3D Glasses - a good summary of 3D technologies and such.